v1.3.0: Adjustable Low Voltage Cut-Off for Parking ModeUpdated 5 months ago
Release Date: 01/10/2025
We’ve released a new firmware update that gives you more control over your dash cam’s low-voltage regulation when hardwired for parking mode.
Previously, the dash cam would automatically power down when voltage dropped to 11.6V to protect your car battery. With this update, you can now choose between 11.6V, 11.8V, and 12V cut-off thresholds, allowing you to fine-tune power protection depending on your vehicle’s battery type and how it reacts to lower voltages.
This ensures safer and more consistent operation for a wider range of vehicles, especially those with smaller or more sensitive batteries.
Download:
Requirements
A Micro SD card (the one used in your dash cam)
An SD card reader or adapter to connect the card to your computer
A computer with internet access to download the update file
⚠️ Note:
The update cannot be performed through the Viidure App. It must be installed manually using a computer and SD card reader.
How to Install the Update
Insert your Micro SD card into the dash cam and format it through the camera’s settings menu.
Remove the SD card and insert it into your computer using an SD card reader.
Download the firmware update file at the top of this page.
Unzip the folder to extract the contents.
Copy the file named
FW96670A.binto the root directory of the SD card (not inside any folders).Re-insert the SD card into the dash cam.
Power on the dash cam and wait while it completes the upgrade process.
⚠️ Do not disconnect power during this time.
You’ll know the update is complete when the DriveVision Wi-Fi light begins blinking again, indicating Wi-Fi has re-enabled.
Turn off the dash cam, remove the SD card, and delete the
FW96670A.binfile.(Optional) You can also reformat the SD card again, either on your computer or through the Viidure App by going to:
Camera Settings → Scroll to Bottom → Format SD Card
Re-insert the SD card into the dash cam and power it on again.
Your firmware update is now successfully installed.
If the dash cam does not power on during the update
If the dash cam does not power on at all when the SD card with the firmware file is inserted, but turns back on once the SD card is removed, please try the following steps.
Option 1, set the update file as Read Only or Locked
After copying FW96670A.bin onto the SD card:
On Windows, right click the file, go to Properties, and set it to Read Only
On Mac, right click the file and set it to Locked
Reinsert the SD card into the dash cam and power it on again.
Option 2, reinitialise the SD card inside the dash cam
If the above does not work, try this method:
Format the SD card to exFAT on your computer.
Insert the freshly formatted SD card into the dash cam.
Power on the dash cam and allow it to record for around 30 seconds.
Turn off the dash cam and remove the SD card.
Insert the SD card back into your computer and copy
FW96670A.bindirectly onto the card.
Do not format the SD card again on your computer at this stage.Reinsert the SD card into the dash cam and power it on to begin the update.
This process allows the dash cam to properly initialise the SD card before the firmware file is applied and resolves most update-related power issues.
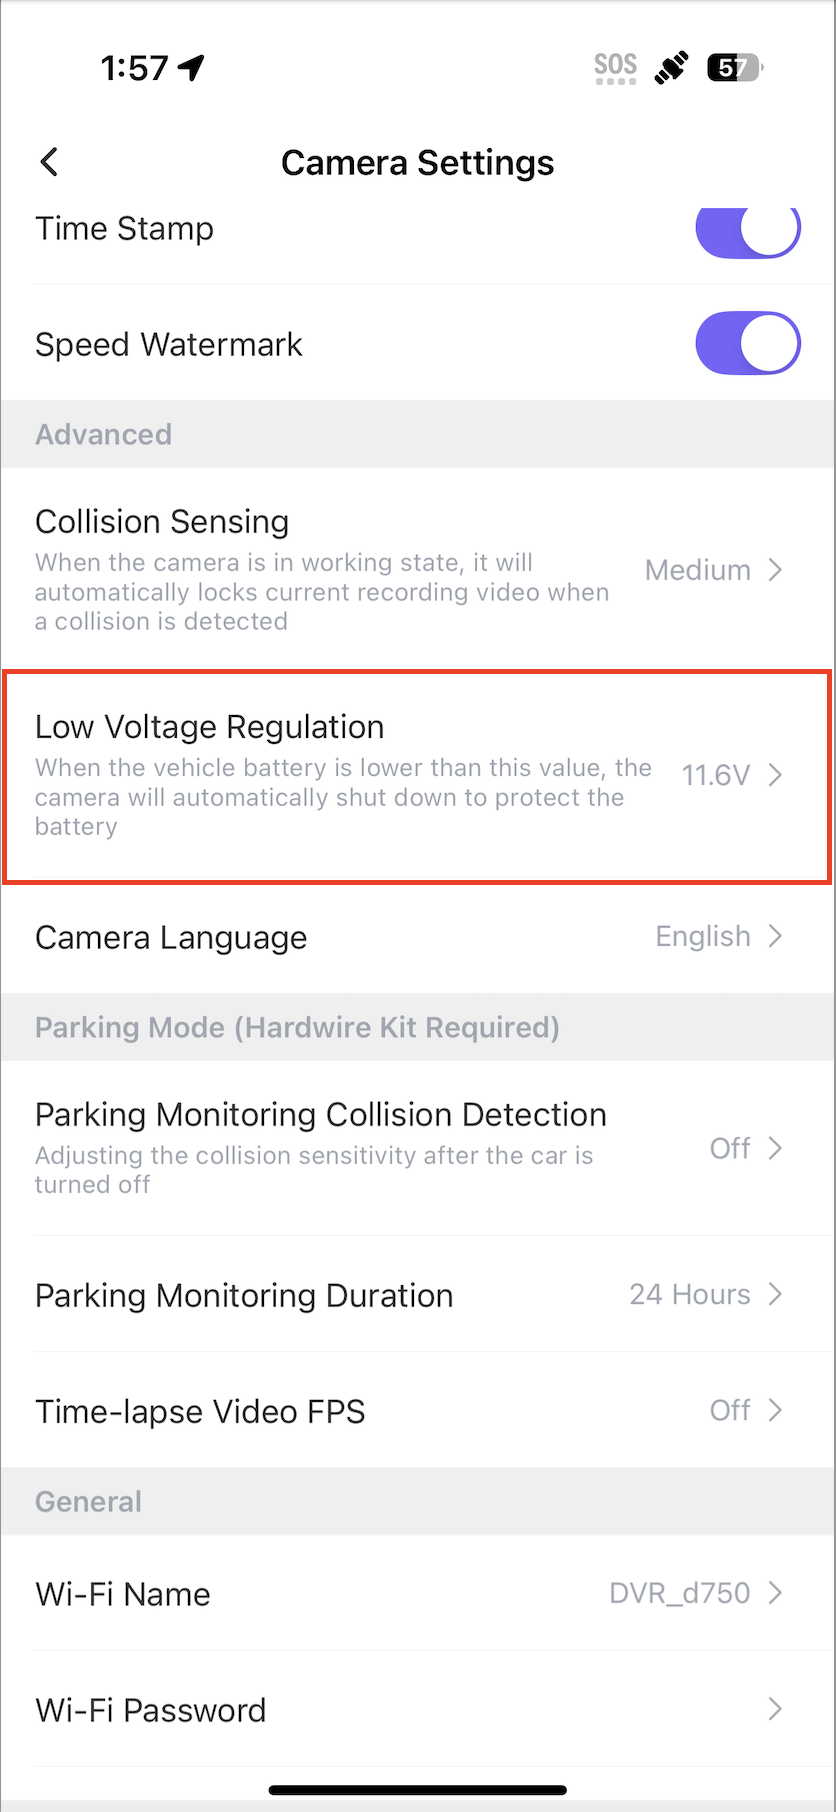
Where to Find the New Setting
To select your preferred voltage regulation level:
Open the Viidure App → Camera Settings → Low Voltage Regulation
You’ll now see three selectable options: 11.6 V, 11.8 V, and 12 V
Version Info
Firmware Version: v1.3.0
Release Date: 01/10/2025
What’s New:
Added customisable low voltage regulation options (11.6 V, 11.8 V, 12 V)
Improved battery protection logic during Parking Mode
General performance and stability improvements